Sweating inside your car, windows up, AC on full blast—and not a hint of cool air? Trust me, nothing’s more annoying in the summer heat. If you drive a Hyundai i20 and your AC has lost its chill, you probably wonder if you need to replace the whole system or if a simple compressor switch will do the trick. I tackled this exact issue on an i20 in my workshop, and I’ll walk you through every detail: what really matters, where to save your money, and how to get professional-quality cooling back.
Overview of the Hyundai i20 AC Compressor Repair
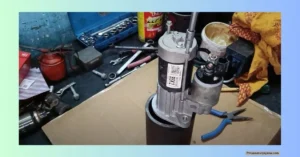
When an i20 rolls in with weak or dead AC, the first thing to check is always the compressor. This car had a 507 model compressor installed last year, a secondhand swap after the original failed. For a while, it cooled well, but it soon started losing gas again, showing typical signs of compressor leakage. Instead of changing all the AC parts, I decided to focus on just the compressor.
Here’s what stood out:
- The pipes and condenser were almost spotless, with no oil, blockages, or visible dirt.
- The cooling was strong until the leak.
- Even a compressor with some blackening inside (slight burn marks or residue from old oil/gas) can still cool nicely, thanks to the robust design of these 507 compressors.
The goal? Replace only what’s needed, using smart checks instead of wasting money on unnecessary parts. It’s a lesson worth repeating for anyone searching “how to repair Hyundai i20 AC compressor repair 2025.”
Diagnosing the AC Compressor Issue
Previous Repairs and Compressor Status
Last year, I fitted a second-hand 507 compressor on this i20. It worked fine at first, with strong cooling and low noise. But within a season, it started losing gas. Even with proper repairs, sometimes used compressors can fail because of hidden cracks or worn-out seals.
Pressure checks are crucial here. I noticed the system would hold pressure for a bit, then lose it—classic leak behavior. To avoid a repeat problem, I decided to swap in a new compressor this time.
Inspection of AC Components
I didn’t stop at the compressor. Every connected part got a close look:
Checklist:
- Pipes: Spotless, inside and out. No sign of oil or particles.
- Condenser: Clean, no dents or clogs.
- Section pipe (low-pressure pipe): Smooth and clear.
Since the pipes and condenser were so clean, I could focus the repair just on the compressor, not the whole AC system. Skipping unnecessary replacement parts saves both time and money—key if you’re price-conscious or just want solid value.
Choosing the Right Compressor Replacement
I get why so many people want a second-hand compressor. It’s budget-friendly, and sometimes you get lucky. Unfortunately, even carefully checked used compressors can have leaks that show up weeks or months later. That was my experience—so now, I go for new to avoid callbacks and extra labor.
About the New Compressor
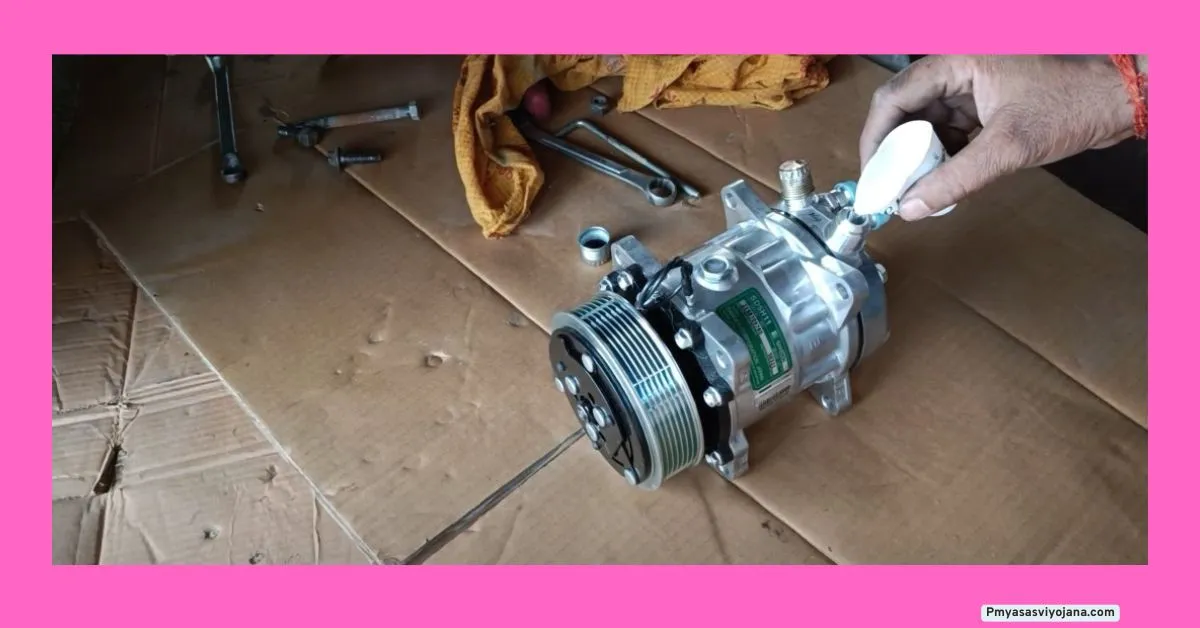
This time, I chose a *507 model compressor, made in Korea. It’s solidly built and handles the Hyundai i20 system well. The coolest part? It’s much more affordable than the OEM part, yet high quality.
| Compressor Type | Price in India (Approximate) | Details |
|---|---|---|
| Hyundai Original Compressor | ₹40,000+ | Genuine brand, dealer supplied |
| 507 Korean Compressor | ₹6,000 – ₹7,000 | Same fit, universal model |
| Second-Hand 507 Compressor | ₹2,000 – ₹3,500 | Budget-friendly, risky |
- Hyundai i20 AC compressor prices vary by type—genuine parts cost more, while quality Korean models save you around ₹34,000.
- Old i20 AC compressor prices or second-hand parts can seem tempting but may not be worth the risk.
- For anyone asking about the “I20 AC compressor second-hand price,” expect to pay less upfront but consider the risk of future leaks.
- If you only need a valve, “I20 AC compressor valve price” is typically less, but full replacement is best if you have recurring leaks.
Installation Overview
Installing the 507 compressor on the i20 is straightforward. The mounting pads and bolts line up perfectly. No special modifications are needed—just remove the old unit, position the new compressor, and bolt it on. It’s one of those rare DIY/garage jobs that doesn’t require custom brackets or tricky adjustments.
Step-by-Step AC System Preparation and Compressor Installation
Want your fix to last? Prep is key. Even the best compressor won’t work right if dust, air, or leaks remain in the system.
Cleaning and Preparing AC Components
Dirt, dust, or debris inside pipes and the condenser can block refrigerant flow or harm the new compressor. Here’s what I did:
- Cleaned the entire condenser using clean water. Years of built-up dust came off and instantly improved airflow.
- Checked every pipe—inside and outside. I wiped them with a clean cloth and looked for signs of oil or black deposits.
- Inspected the section pipe for blockages.
A clean system keeps your compressor from working overtime and helps avoid high “how to repair Hyundai i20 AC compressor repair cost” down the road.
Installing the New Compressor
Here’s the step-by-step action plan:
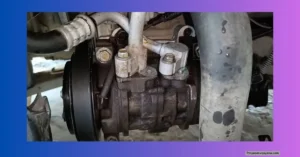
- Remove Old Compressor: Disconnect pipes, unbolt the unit, and take it out gently.
- Fit New Compressor: Position the 507 compressor, align with the mounting points, and secure bolts and pads tightly.
- Leak Check: Apply soapy water (shampoo works well) on all connection points and bolts—look for bubbling, a sign of leaks.
- Pressure Test: Fill the system with nitrogen or air to test pressure, keep it at 250 bar, and wait for 30 minutes.
- Confirm No Leak: After 30 minutes, check the pressure gauge—if it holds, the system is sealed.
- Reconnect All Pipes: Once leak-free, connect the pipes and tighten all fittings.
Vacuuming the AC System
Next, I vacuumed the AC system for 15-20 minutes using a vacuum pump. This removes all air and moisture, so only refrigerant circulates inside. Air in the system can reduce cooling and even damage the compressor.
Gas Refilling Process
Once vacuuming was done, I refilled the system with a full bottle of AC gas (for the i20, don’t underfill). During this, I watched the pressure gauges closely—high-side pressure at 250, low-side at 50 initially. These values help you spot small issues before they become major. For anyone searching “how to repair Hyundai i20 AC compressor repair India,” this step can save you from extra visits.
Testing and Performance Verification After Installation
Initial Tests and Temperature Check
After fitting the new compressor, I cranked up the i20, turned on the AC, and watched the numbers:
- Low-side pressure held steady at 50, then gradually dropped to 25 as the system stabilized.
- The outside temperature sat at 34°C, but my in-cabin thermometer started dropping fast.
- Within a few minutes, the inside air hit 8.9°C, then hovered at 8°C—cold enough to make you forget it’s boiling outside.
Here’s a quick before-and-after:
| Condition | Before Repair | After Repair |
|---|---|---|
| Cabin Temp (Min) | 34°C | 8 – 9°C |
| Pipe Condition | Warm/Normal | Icy/Chilled |
| Compressor Status | Leaking/Noisy | Silent/Strong |
When the compressor kicked off automatically at low temp (around 8°C), it meant the system recognized chill and was running on autopilot—exactly what you want.
Demonstrating Efficient Cooling
The feeling is instant. Within 20 seconds, I went from sweating to dry—no exaggeration. Cold air poured from the vents, pipes frosted over, and the cabin cooled off even with the sun blazing outside.
What really matters:
- The 507 compressor, even if you spot slight blackening, works reliably.
- System pressure and temperatures line up with factory specs.
- There’s no need to change the entire AC system when the core parts (pipes, condenser) are clean and solid.
Final Checks and Belt Replacement
I checked the AC belt, per my mechanic’s advice, and swapped in a new one of the proper size. The belt connects the compressor to the engine and needs to match the tension and width—don’t skimp on this. After a final round of tightening everything, system fitment was 100%.
Key Takeaways and Practical Advice for Hyundai i20 Owners
If you want to know how to repair a Hyundai i20 AC compressor repair kit style or worry about price, here’s what you actually need to focus on:
- Diagnose first: Pressure test and visually inspect your system. Don’t change parts blindly.
- Keep pipes/condenser clean: Dirt kills performance and can damage your new compressor.
- Go for new compressors when possible: The Korean 507 model is powerful and much less costly than the dealership original.
- Understand pricing: Old i20 AC compressor prices (secondhand) can seem cheap but may cost more with repeat failures.
- AC compressor repair cost: In India, a Korean 507 swap costs around ₹6,000–₹7,000 for the part, plus labor.
- Compressor valve replacement: Not always the fix you expect; usually best to do a full compressor change unless the valve is known to be at fault.
- Vacuum and gas refill: Never skip these steps, or you risk low cooling and future breakage.
- Maintenance: Regularly clean your AC system and do leak checks before peak summer.
Bullet checklist for owners:
- Check pipe/condenser cleanliness before any repair.
- Pressure test for leaks.
- Vacuum and refill with the correct gas quantity.
- Use the right belt—tight tension, proper length.
- Always test cooling inside the car, not just at the vent.
- Save money by skipping full-system replacement if core parts are good.
Read also.
- New Hero Xtreme 125R Update Version 2025: Full Review, Key Changes, and On-Road Price Insights
- New Hero Splendor Plus i3S Update Model Detailed 2025: Complete Review & User Experience
- New Tvs Apache RTS-X Latest Update 2025: Full Review, Features, Specs, and Launch Expectations

Hello! I’m Rajesh Kumar, bringing you unbiased car and bike reviews with real-world insights to help you find the perfect ride for your lifestyle.