If you’re struggling with weak or intermittent AC cooling in your Grand i10 and wondering about solutions that truly last, you’re in the right place. I’ll walk you through a real case of a full AC system overhaul on a Hyundai Grand i10—including the crucial question of “how to repair Grand i10 AC compressor 2025,” what genuine parts cost, how the process looks step-by-step, and what you can expect as a customer. Whether you’re weighing the Grand i10 AC compressor 2025 replacement cost or trying to figure out if genuine parts really matter, this guide pulls back the curtain on everything.
Diagnosing a Stubborn Grand i10 AC Problem
Most AC issues don’t start overnight. In this Grand i10, the symptoms crept up over time:
- The AC’s low pressure never dipped below 60 psi, even at idle.
- When revving the engine, it dropped to around 40-45 psi. That meant cooling during acceleration, but not at a standstill.
- The owner reported these issues over many months and finally reached out after seeing my content online.
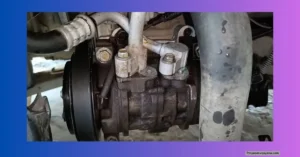
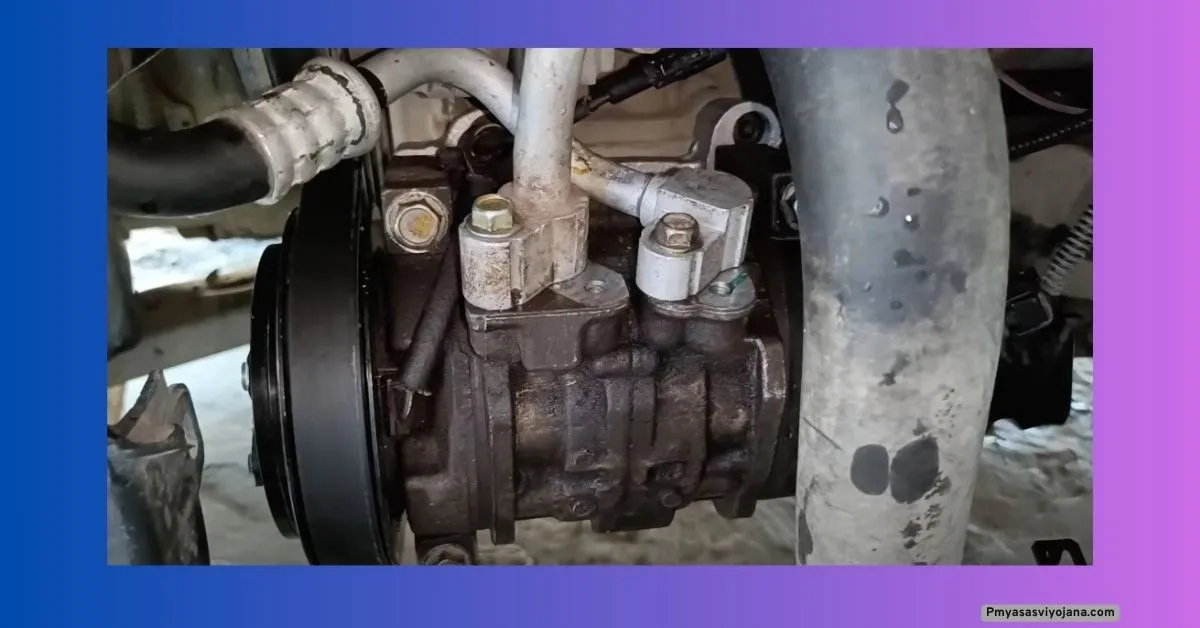
From experience, in such cases, the culprit is usually the AC compressor. Sure enough, my checks confirmed it:
- The compressor had failed.
- The inside of the system was coated in black oil residue (“black sludge”), which points to severe part wear or overheating.
- There is almost no compressor oil left in the system.
- The cooling coil and condenser were both blackened, meaning a full-system replacement was the safest fix. Piecemeal repair would have just delayed another breakdown.
- I always tell I10 owners: with age, especially if the compressor fails, don’t risk mixing new and old parts. In this model, a failing compressor puts extra strain on the system and leads to more damage.
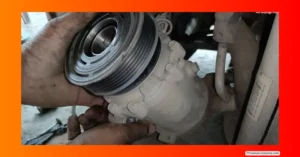
Disassembling and Cleaning: The Key to Reliable Repair
Getting a Grand i10’s AC back in shape means getting into every nook and cranny. Here’s the step-by-step process I follow:
- Full dashboard removal to access all AC components—not just loosening a few screws.
- Carefully remove the compressor, condenser, cooling coil, and expansion valve.
- Inspect every part.
- Most parts covered in thick, dark grime from oil and dust.
- Radiator and dashboard air paths almost blocked by dirt.
- Complete interior cleaning:
- Compressed air blows out dust.
- Water rinses any caked-on dirt.
- I even washed the radiator so airflow wouldn’t be restricted once the car was back on the road.
- Discharge pipe replacement:
- The original pipe showed heavy damage from repeated overheating.
- Fitted a new, genuine pipe.
- Main AC pipe flushing:
- Blackened residues flushed with specialized cleaning fluids.
- Flushed pipes reduce the chance of cross-contaminating new parts.
Quick advice: keeping everything spotless before installing new parts increases the life of the AC and prevents breakdowns. Corners cut here mean issues later, especially with sensitive components in Hyundai models.
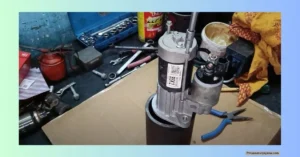
Installing Genuine AC Parts: Why Quality Matters
Now for the heart of the repair: installing high-quality, original parts for long-term peace of mind. I always stress to my customers, “No duplicates, no Delhi-market parts in my workshop.” Only brands I trust:
- Compressor: Haenon brand, known for its fit and durability in Hyundai models.
- Condenser: Haenon brand to match the new compressor’s specs.
- Cooling Coil: The Sanden brand offers consistent performance under tough Indian weather conditions.
- Expansion Valve: Fitted and checked for perfect seal.
- Discharge pipe: Fully replaced; old pipe was beyond saving.
Why Original Parts?
- Better cooling. Genuine parts, especially if you’re replacing the full set, bring your car back to “like new” condition.
- Longer part life. With matching original parts, the compressor and coil work in sync, putting less stress on the system.
- Value for money. You avoid frequent breakdowns or leaks, making your investment go further.
If you’re wondering about the Grand i10 AC compressor 2025 price or the Hyundai Grand i10 AC compressor 2025 price, I always recommend checking with workshops that guarantee original branding. In my repairs, you won’t find any compromise.
Compressor Oil: The Small Detail Many Miss
Most new compressors come pre-filled with 110 ml of professional-grade oil. But for safety, I always add an extra 40 ml to coat all pipes, the condenser, and the cooling coil. This keeps the system lubricated and helps prevent a repeat breakdown.
Fitting Tips:
- Compressor fitted with four bolts (even if space is tight).
- The condenser installs with just four locking bolts.
- All new pipes and expansion valves fitted tightly—no loose ends.
- Leak check is non-negotiable: the system is pressurized to 250 psi and checked with shampoo water at every joint. No bubbles? No leaks.
Vacuuming and Recharging: The Last Step Before Cool Breeze
After the physical repairs, I connect the system to a vacuum pump for at least 15 to 20 minutes. This removes any moisture and air that can harm AC performance.
- The vacuum gauge shows the needle moving into negative territory as air leaves the system.
- As soon as vacuuming is done, I start the gas refill.
- About half a bottle of refrigerant gas is needed for this model. Amount may vary depending on model year and previous refills.
- I check low-side pressure—now it settles at 22-25 psi instead of the old reading of 60+.
- High-side pressure sits at 150-160 psi (in cool weather), which is exactly where a healthy system should be.
This stable pressure is the surest sign of a real fix. Not only does the air blow colder, but it stays consistent even as the car is driven.
Final Tests: Temperature Drop and Customer Satisfaction Guaranteed
Back on the road, the real proof comes in the test drive.
- I installed a digital thermometer inside the cabin, setting the blower speed to 2 for a realistic test.
- The cabin temperature started at 23°C but dropped quickly. Within minutes, it hit 6.1°C—cold enough for any summer in India!
- We drove the car for about 2-3 kilometers to see if the cooling lasted under load.
Key takeaways from satisfied customers:
- Cooling is even and stable and reaches near new-car performance.
- All original parts used, with clear demonstration and explanation.
- Pressure, temperature, and pipe checks confirm repair integrity.
- Full after-service support in case any repair is a grand up.
Conclusion
Getting your Grand i10’s Grandck in A Chape is all about doing the job right the first time. If you’ve been searching for guidance on how to repair a Grand i10 AC compressor 2025, what the Hyundai Grand i10 AC compressor 2025 price really is, or just want to avoid getting ripped off with substandard parts, remember: clean work, genuine parts, and clear communication matter most.
Read also.
- New Hero Xtreme 125R Update Version 2025: Full Review, Key Changes, and On-Road Price Insights
- New Hero Splendor Plus i3S Update Model Detailed 2025: Complete Review & User Experience
- New Tvs Apache RTS-X Latest Update 2025: Full Review, Features, Specs, and Launch Expectations

Hello! I’m Rajesh Kumar, bringing you unbiased car and bike reviews with real-world insights to help you find the perfect ride for your lifestyle.