Water inside your car can feel alarming, especially if you start seeing puddles under the dashboard, on the passenger side, or along the floor. I recently took apart a Maruti Suzuki Alto 800 at my Shree Balaji Auto workshop to tackle this exact problem. Whether it’s water dripping in during rain, your car leaking under the engine, or moisture showing up only when the AC’s running, I’ve broken down every step I take to find and fix this headache.
If you’re asking, “Why is water leaking in my car when it rains? How to repair 2025,” you’re not alone. Good news: I cover all the reasons and repairs here, using the Alto 800 as an example, but the tips apply to most small vehicles.
Common Water Leakage Problems in the Maruti Suzuki Alto 800
Water leakage inside a car shows up in different ways. In the Alto 800, many owners notice:
- A wet floor on the passenger side or driver side
- Moisture collecting near or below the dashboard
- Soaking or dripping close to the AC vents and ducts
Some of the most frequent complaints I get include
- Car leaking water underneath passenger side after rain
- Water leakage in car front, dripping down behind the dashboard
- Water inside car floor and carpet, even on dry days
- Sometimes the AC is running, and suddenly, there’s water under the dash
Left alone, these leaks can make for a smelly, uncomfortable car and even damage electronics or promote rust.
Symptoms to watch for:
- Damp, soggy carpets, especially after rain or AC use
- Foggy windows inside the car for no reason
- Water stains running down from the dashboard or vents
- A continuous musty smell that gets worse after it rains
If you notice any of these, it’s time to act before the problem spreads.
Opening Up the Dashboard: The Key to Accurate Repairs
One thing I’ve learned: quick fixes don’t work when water keeps coming back. To fully diagnose water leakage inside a car, I have to open the dashboard and get to the cooling coil unit (also called the evaporator). Some might say it’s possible without removing the dashboard, but in the Alto 800, hidden screws behind the dashboard make this impossible.
Here’s my step-by-step approach:
- Disconnect the battery and remove all necessary panels for safety.
- Carefully detach the dash, being mindful of wiring and AC controls.
- Find and remove the screws from both the front and back sides of the cooling coil unit.
- Gently open the unit, checking for water accumulation, dirt, and the smell of mold.
During this process, I usually find
- Pools of water stuck inside the AC box
- Build-ups of dust and debris, especially on and around the cooling coil
- Pipes that appear clean outside but may have blockage or misalignment inside
If you skip the dashboard removal, you might miss hidden leaks or leave old moisture behind, which can rot foam and seals over time.
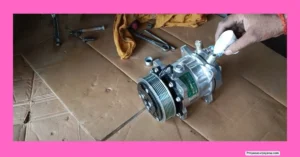
Diagnosing Water Leaks: The Real Causes Exposed—Checking the Cooling Coil and Pipes
The first thing I inspect is the condition of the pipes that carry AC condensation outside the vehicle. In many cases, like the Alto, pipes are clean and not blocked.
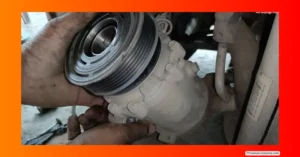
The culprit can be the rubber seal around the cooling coil, which often gets brittle, rots, or is eaten away by time and, surprisingly, by ants. When seals break down, water that should drain outside instead seeps into the passenger cabin, causing the dreaded water leakage inside car problems.
The Trouble With Ants and Foam Decay
It might sound odd, but small ants create nests inside the foam packing around these seals. I see this in so many Alto cars. They eat away at the foam, enlarging gaps and making it easier for water to find its way inside. Even if you clean or replace pipes, if you don’t treat the foam and fix the sealing issue, the leak returns.
What usually damages the foam and rubber seals?
- Frequent AC use and heat cycling that makes foam sticky or brittle
- Dirt and debris providing a nesting spot for ants
- Moisture that rots organic packing materials
If the foam packing’s gone or the rubber is chewed up, I swap it for a tough tube-style system using a plastic tube cut to size and glued in place with a strong adhesive like Fevicol. This method is more reliable than just using new foam because it resists rot and insects.
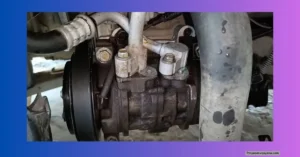
Dust, Dirt, and Blockages: The Hidden Foe
Many Alto 800 cars don’t have a factory AC filter. That means dirt and dust can quickly pack into the cooling coil, blocking escape holes for condensation water.
As the dust piles up, it can:
- Block the coil’s drain holes, sending water straight into your cabin
- Hurt cooling performance, making the AC feel weak
- Make moisture linger on the dashboard or under seats even with a clean drainpipe.
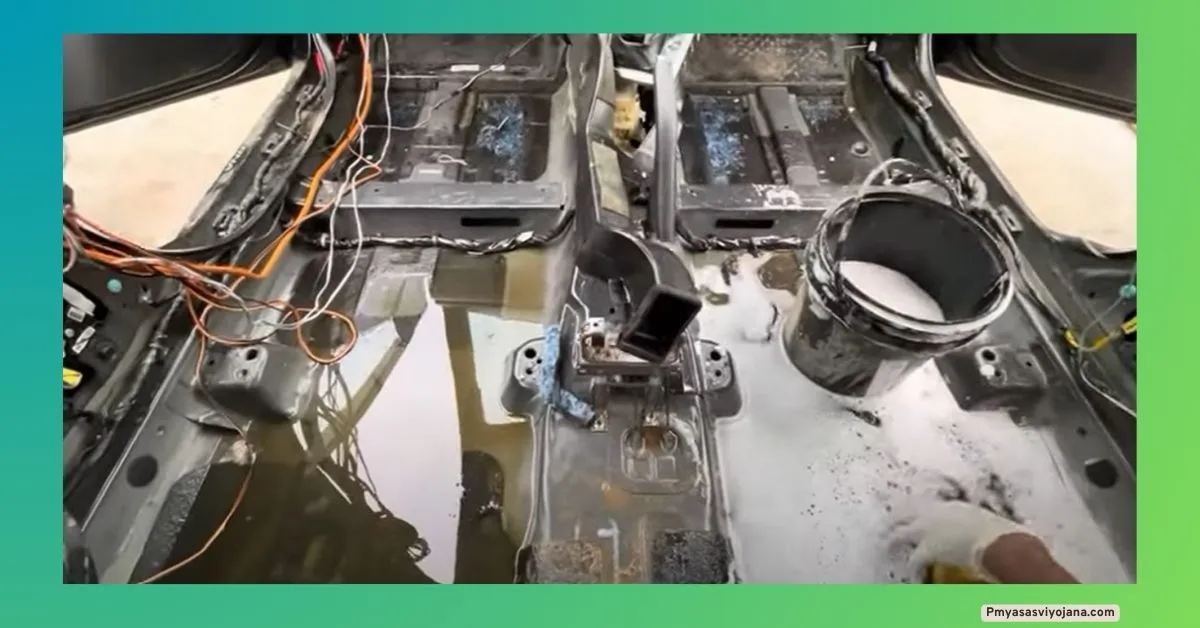
The fix is a detailed cleaning of the entire unit. I use a powerful pressure washer to flush away dirt, followed by thorough drying in sunlight.
Common causes of water leakage inside the cooling system:
- Cracked or missing rubber seals
- Chewed foam packing from ants or age
- Clogged drainpipes
- Dirty cooling coils
- Incorrect pipe installation or damaged hose connections
Tools and Cleaning: Doing It Right—Essential Tools for a Lasting Fix
For this kind of repair, I depend on
- A high-pressure washer (150 bar pressure), which I got from Flipkart after testing others. It offers enough force yet has an auto shut-off for safety.
- A nozzle with a thin tip for getting inside blowers and coils but designed to avoid spraying water directly into delicate electrical parts.
- Dry, clean clothes for checking moisture during and after the repair.
Cleaning Procedure: Step by Step
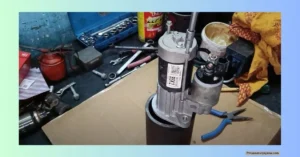
- Carefully detach the cooling coil and blower motor.
- Use the pressure washer to clean out the coil, avoiding direct hits to electric components. Keep water away from motor windings and resistances.
- Clean the blower motor with a modified nozzle for precise control.
- Dry every part thoroughly in sunlight—no shortcuts. Residual moisture can cause mold or new leaks.
- Replace or repair foam and rubber seals as needed, using tube replacements when possible.
Safety tips during cleaning:
- Never spray water into exposed electrical points.
- Double-check all rubber- and foam-packed joints for seal integrity.
- Let parts sit until completely dry.
- Remove blower motor resistance before washing the motor to avoid shorting.
Repairing and Replacing Damaged Parts Foam Packing Repair and Alternatives
After years of AC use and heat, regular foam can melt, sag, or get eaten away, especially in Alto cars. If I find the foam damaged or gone, I use a circular tube cut to fit the same space, secured with glue. This setup doesn’t rot or attract ants the way foam does.
Pipe Replacement and Proper Fittings
Any old or damaged pipes should be replaced. Even if the original pipe looks clean, it’s better to use a fresh tube. Cut to fit, secure with clamps or sealant, and make sure the water runs to the correct exit path outside.
Reassembling the dashboard requires tight, gap-free installation of the cooling unit and blower motor. Use all the factory screws, and be careful not to compress seals unevenly.
Filter Cleaning and Reinstallation
If the car has a filter, clean and dry it before refitting. If not, consider installing a universal filter to keep future dust out and reduce future leaks.
Testing the Repairs: How I Know the Leak Is Gone—Pressure and Leak Checks
After everything’s back in place, I check the cooling system’s pressure by filling it to around 25 psi. Watch the connections, especially near the coil, for any signs of leaks.
I then use a completely dry cloth under the dashboard and floor to check for any moisture after a test run. If the cloth stays dry, we’re on the right track.
Vacuum and Gas Recharge
Next, I vacuum the AC system for about 15 minutes, then refill gas. Alto 800 works best with 350-380 grams of refrigerant—don’t overfill. Too much gas stresses the compressor and won’t make cooling stronger, just more likely to fail.
Check that the car leaking water underneath the passenger side when the AC runs is actually clean condensate, not a result of a leak.
Airflow and Temperature Tests
After repairs, turn on the AC to all levels. Airflow should be steady on every setting. Use a thermometer to check the cabin; temperatures should drop fast without water collecting inside. If you see water leakage in the car front again, it’s time to reinspect the seals and pipes.
Testing steps checklist:
- Check pressure at 25 psi; look for drops or leaks
- Inspect all visible pipes and seals for wetness
- Run AC at different speeds and fan levels
- Use a dry cloth as a sensor under the dashboard.
- Measure temperature at vents (expect rapid cooling)
- Confirm water drains out under the car, not inside
If everything checks out, your car should no longer have issues with water leakage inside the car or water leaks in the car when it rains.
Preventive Maintenance Tips
To keep your Alto or any car leak-free in 2025, here’s what I recommend:
- Inspect all rubber seals and foam packing every 6 months.
- Clean the cooling coil and blower assembly at least once a year.
- Replace drainpipes if they feel hard, look cracked, or clog often.
- Keep the car interior clean to reduce dust buildup near the coil.
- Add or replace AC filters to stop dust from reaching inside the system.
- Look for signs of ants or insects under the dash.
- Avoid parking under trees, which can encourage ant entry and add debris.
- Whenever you notice the carpet feels damp, find the source early.
Building preventive habits means you won’t have to keep asking, “Why is water leaking inside my car from the AC?” or stress over a soggy passenger seat again. If you found this guide helpful or fixed a leak using these steps, let me know in the comments.
Read also.
- New Hero Xtreme 125R Update Version 2025: Full Review, Key Changes, and On-Road Price Insights
- New Hero Splendor Plus i3S Update Model Detailed 2025: Complete Review & User Experience
- New Tvs Apache RTS-X Latest Update 2025: Full Review, Features, Specs, and Launch Expectations

Hello! I’m Rajesh Kumar, bringing you unbiased car and bike reviews with real-world insights to help you find the perfect ride for your lifestyle.